 Save
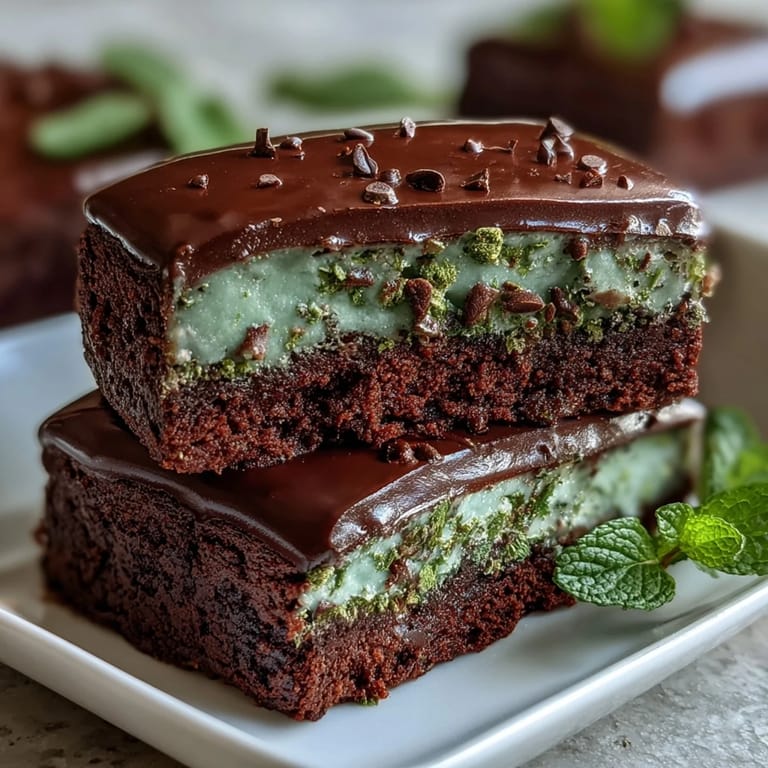
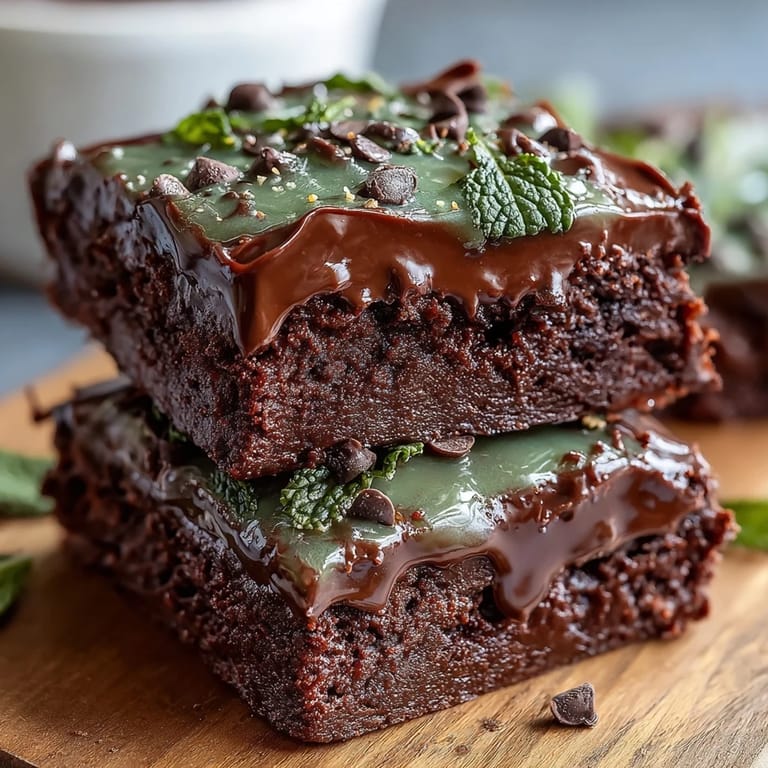
Save My coworker Sarah brought these to the office on March 16th, and I watched people gravitate toward them like they were magnetic. The green tint caught everyone's eye first, but it was that first bite—fudgy, cool mint dancing with rich chocolate—that made someone say, "Wait, these are homemade?" She'd made them the night before, testing a festive twist on her grandmother's brownie recipe, and honestly, they've become my St. Patrick's Day non-negotiable ever since.
I made these for my neighbor's St. Patrick's Day gathering last year, and they disappeared before the main course even hit the table. One guest kept asking if I'd ordered them from some specialty bakery, which was funny because I was still in my kitchen at 2 p.m. in my oldest apron, cocoa powder somehow on my shoulder. That moment made me realize festive doesn't mean complicated—it just means showing up with something made with intention.
Ingredients
- All-purpose flour (3/4 cup): This is your structure; don't skip the sifting urge, but gentle folding keeps the bites tender.
- Unsweetened cocoa powder (1/2 cup): Use quality cocoa if you can; it's the backbone of the flavor and makes a real difference in depth.
- Baking powder (1/2 tsp): Just enough to give a whisper of lift without making them cake-like.
- Salt (1/4 tsp): This tiny amount wakes up all the chocolate flavors.
- Unsalted butter (1/2 cup, melted): Slightly cooled means it won't scramble the eggs; this is non-negotiable for fudgy texture.
- Granulated sugar (1 cup): Creaming it with melted butter creates that signature dense crumb.
- Eggs (2 large, room temperature): Cold eggs make lumpy batter; let them sit out while you prep everything else.
- Vanilla extract (1/2 tsp): A quiet enhancer that lets the mint and chocolate shine.
- Peppermint extract (1/2 tsp): Start here; you can always add more, but you can't take it back.
- Green food coloring (2–3 drops, optional): Skip this if you're not feeling festive; the flavor doesn't depend on it.
- Mini chocolate chips (1/2 cup, plus more for topping): They distribute evenly and melt into pockets of cocoa bliss.
- Chopped Andes mints or mint chocolate (1/4 cup, optional): These add bursts of minty texture; totally optional but honestly worth hunting down.
Tired of Takeout? 🥡
Get 10 meals you can make faster than delivery arrives. Seriously.
One email. No spam. Unsubscribe anytime.
Instructions
- Get your oven ready:
- Preheat to 350°F and grease your mini muffin tin or line it with liners. This step saves you from sticking nightmares and makes cleanup feel less like punishment.
- Mix the dry team:
- Whisk flour, cocoa powder, baking powder, and salt in a medium bowl until everything looks evenly combined. Breaking up any cocoa lumps now prevents bitter pockets later.
- Create the wet base:
- In a large bowl, whisk melted butter and sugar until they're well combined and slightly glossy. Add your eggs, vanilla, peppermint extract, and food coloring if using; mix until the batter looks smooth and homogeneous.
- Marry the two worlds:
- Gently fold the dry ingredients into the wet mixture, stirring just until you don't see flour streaks anymore. Overmixing here makes brownie bites tough, and that's the opposite of what we're after.
- Add the good stuff:
- Fold in your mini chocolate chips and chopped Andes mints, making sure they're distributed throughout. You want chocolate in every bite, not just lucky ones.
- Fill and top:
- Spoon batter into each muffin cup about three-quarters full, then sprinkle extra chocolate chips on top if you're feeling generous. The topping chips create little pockets of melted chocolate on the surface.
- Bake with intention:
- Bake for 13 to 15 minutes; a toothpick inserted into the center should come out with a few moist crumbs clinging to it, not clean. This is how you keep them fudgy instead of cakey.
- Cool gracefully:
- Let them sit in the tin for 5 minutes to set slightly, then transfer to a wire rack. They'll continue cooking slightly from residual heat, so don't leave them in the tin too long.
 Save
Save There's something almost magical about how a small, green-tinged brownie bite became the unofficial dessert of our St. Patrick's Day tradition. My family now expects them, and I've stopped pretending I have any restraint around them—if I make a batch, I'm eating at least three while they're still warm.
The Mint-Chocolate Balance
The trickiest part of this recipe isn't the baking; it's the mint-to-chocolate ratio. Too much peppermint extract and the chocolate gets overshadowed, leaving you with a toothpaste-like dessert that nobody wants. I learned this the hard way during my first attempt, when I got overzealous and added a full teaspoon. Now I start at a half-teaspoon and taste the batter—yes, raw egg batter and all—to adjust before baking.
Why Mini Muffin Tins Are Worth It
These brownie bites exist specifically because mini muffin tins create perfect single-bite portions that look fancy without the fuss. The smaller size also means they bake faster and stay fudgier in the middle. If you don't have a mini muffin tin, you can use a regular one and adjust baking time to 18–20 minutes, but you'll lose the bite-sized charm that makes people reach for a second one.
Storage and Make-Ahead Magic
These brownies actually taste better the next day once the flavors settle and the texture sets. Store them in an airtight container at room temperature for up to 5 days, or freeze them for up to 3 weeks if you're planning ahead. I like to make mine the day before a gathering, which takes the morning stress completely off my shoulders.
- Let frozen brownie bites thaw at room temperature for about 20 minutes before serving; they'll taste freshly baked.
- If you're transporting them somewhere, pack them in layers separated by parchment paper so they don't stick together.
- A dusting of powdered sugar on top just before serving makes them look even more intentional and festive.
 Save
Save These little bites remind me that festive desserts don't need to be intimidating or time-consuming. Just a simple brownie base, a whisper of mint, and a handful of chocolate chips can make a moment feel special.
Recipe FAQs
- → Can I use regular chocolate instead of mini chips?
Yes, chopping regular chocolate into small pieces works well as a substitute for mini chocolate chips.
- → What does the peppermint extract add to the bites?
It provides a refreshing minty note that complements the rich chocolate and enhances the overall flavor.
- → How do I ensure the bites stay fudgy?
Be careful not to overbake; a toothpick should come out with moist crumbs. Cooling them fully also helps set the fudgy texture.
- → Can I omit the green food coloring?
Absolutely, the bites will still taste great without coloring; it’s purely for visual festivity.
- → What’s the best way to store these brownie bites?
Store in an airtight container at room temperature for up to five days to maintain freshness.
- → Can I enhance the mint flavor further?
Increasing peppermint extract slightly adds more mint intensity but avoid too much to prevent bitterness.